How to Fix Phone Microphone – iPhone and Android Solutions
When your phone microphone stops working, everyday tasks like calling, recording voice notes, or using voice commands suddenly become frustrating. Both iPhone and Android users encounter this problem frequently, and the causes range from simple software glitches to more serious hardware damage. Understanding what triggers microphone failures helps you apply the right fix faster and avoid unnecessary repairs.
Software updates, accumulated debris in microphone ports, permission restrictions, and water exposure represent the most common culprits behind microphone issues. The good news is that the majority of problems stem from software or cleanliness rather than permanent hardware failure, meaning most users can resolve the issue without visiting a repair shop.
Why Is My Phone Microphone Not Working?
Microphone failures rarely happen without warning signs. Recognizing the specific symptoms helps narrow down whether the problem originates from software settings, physical obstructions, or internal component damage.
Testing your microphone in multiple applications helps identify the scope of the problem. If Siri or Voice Memos works but your camera app does not record audio, the issue likely affects specific functions rather than the hardware itself. Call-related failures sometimes point to network or app-level permissions rather than physical microphone damage.
- Around 80% of microphone issues resolve through software troubleshooting steps like restarts and permission checks.
- Dirt and debris cause muffling in roughly 15% of reported cases, typically resolved with careful cleaning.
- Hardware failures account for fewer than 5% of microphone problems and usually require professional service.
- iOS updates from iOS 14 through recent versions have occasionally disrupted microphone functionality across iPhone models.
- Speakerphone working when regular calls fail often indicates a software rather than hardware problem.
- Water damage symptoms may not appear immediately but often worsen over days or weeks.
- Professional repair becomes necessary when device cleaning and software resets produce no improvement.
| Symptom | Quick Diagnostic Check |
|---|---|
| Mic completely silent | Test recording in Voice Memos or voice recorder app |
| Sound muffled or distorted | Check for visible debris in microphone holes |
| Works on speaker but not regular calls | Likely software issue; test after restart |
| Static or white noise in recordings | Review recent app updates or iOS changes |
| Intermittent failure | Test in multiple apps to identify patterns |
| No audio in videos but apps work | Points to update bug rather than hardware failure |
How to Fix iPhone Microphone Issues
iPhone users experiencing microphone problems should work through software solutions before considering hardware repair. Apple support documentation and independent technicians consistently recommend starting with permission checks, device restarts, and software updates.
Checking Microphone Permissions
Navigate to Settings, then Privacy and Security, and select Microphone. Ensure that every app requiring audio input has its toggle enabled. Additionally, check Settings, Accessibility, Audio/Visual, and look for Microphone settings that might restrict audio access. Some users discover that a previous privacy adjustment inadvertently disabled microphone permissions for frequently used applications.
Cleaning Microphone Openings
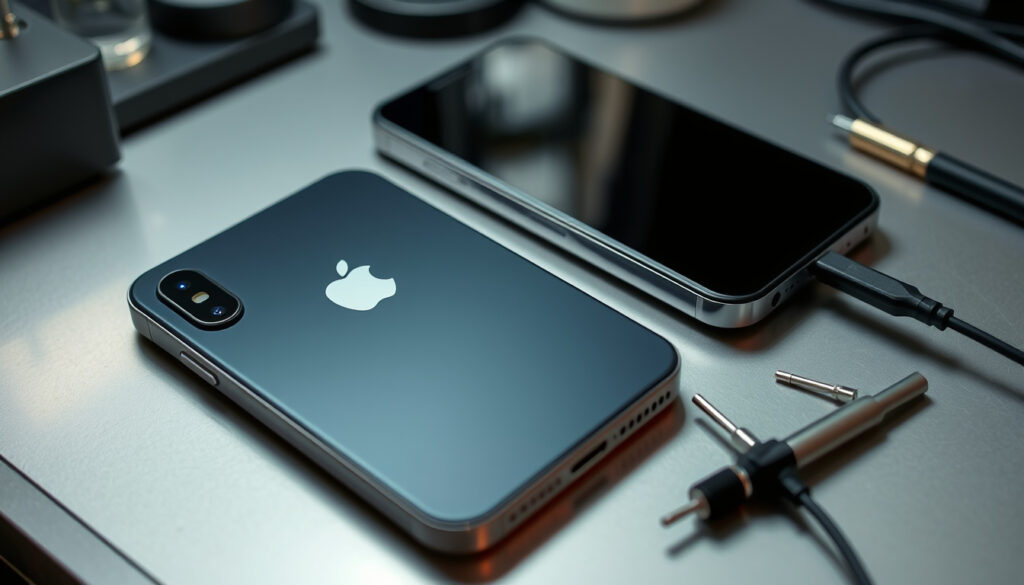
Remove your case and any screen protector before cleaning. Locate the microphone holes on the bottom edge, top front edge, and rear near the camera. Use a soft brush, wooden toothpick, or compressed air to gently clear accumulated lint and debris. For stubborn buildup, Apple technicians sometimes use isopropyl alcohol applied with a fine brush. Avoid inserting objects too deeply into openings to prevent damaging internal components.
Activate Siri immediately after cleaning your device. If Siri responds accurately, your microphone issue has likely been resolved through debris removal.
Restarting and Updating Your iPhone
Standard restart involves holding the power button and either volume button until the slider appears, then sliding to power down. After your device shuts down completely, press the power button to restart. For force restarts, quickly press volume up, then volume down, and hold the power button until the Apple logo appears. Update your iOS version through Settings, General, and Software Update to address known bugs affecting microphone performance.
When Speakerphone Works But Regular Calls Fail
This specific symptom commonly occurs after iOS updates. The microphone built into the speaker assembly sometimes continues functioning while the primary bottom microphone does not. Users experiencing this pattern should disable Bluetooth to rule out accessory interference, then test the standard call function. Apple community discussions document this issue affecting various iPhone models following iOS 14, iOS 17, and later updates.
How to Fix Android Phone Microphone
Android microphone troubleshooting follows similar principles to iOS, though navigation paths and specific terminology vary across manufacturers like Samsung, Google Pixel, and others. Users should adapt instructions to match their device interface.
Granting App Permissions on Android
Open Settings, navigate to Apps, select your target application, then tap Permissions. Locate the Microphone entry and ensure it shows as allowed or permitted. Some Android versions require you to tap the permission category to reveal individual app controls. Messaging apps, camera applications, and voice recording tools frequently need explicit permission grants to access microphone hardware.
Using Safe Mode for Troubleshooting
Safe Mode disables third-party applications temporarily, allowing you to determine whether an installed app conflicts with microphone operation. Hold the power button, then long-press the restart option and select Safe Mode. Test your microphone using the built-in voice recorder. If audio works correctly in Safe Mode, a recently installed application is likely causing the interference.
Cleaning Android Microphone Ports
Examine your device for microphone openings, typically located at the bottom edge, top edge, or rear panel near the camera. Use a soft brush or compressed air to clear visible debris without inserting objects into the ports. Avoid applying liquids unless the device is completely dry, as moisture inside openings causes corrosion over time. Samsung and Pixel devices have varying port configurations, so identify your specific model microphone locations before cleaning.
How to Clean Your Phone’s Microphone
Regular maintenance prevents debris accumulation that compromises audio quality. Understanding the locations of multiple microphone openings on modern smartphones helps ensure thorough cleaning.
Locating All Microphone Holes
Modern smartphones contain multiple microphones for different functions. Bottom-edge microphones typically handle voice calls and general recording. Top-front microphones near the earpiece support FaceTime, video recording, and noise cancellation. Rear microphones near the camera module assist with video recording and ambient sound capture. All openings require periodic cleaning to maintain optimal performance.
Safe Cleaning Techniques
Always remove cases and screen protectors before cleaning. Work in good lighting to see debris clearly. Soft brushes designed for electronics work well for regular maintenance. Compressed air cans remove loose particles effectively. For persistent buildup, slightly dampen a brush with isopropyl alcohol and gently work around the openings. Allow the device to air dry completely before reassembling or testing.
Apple authorized technicians use isopropyl alcohol and fine brushes for microphone cleaning. This approach dissolves oils and debris without introducing moisture damage when performed correctly and allowed to dry thoroughly.
Addressing Water Damage
Water exposure requires immediate action. Power off your device immediately to prevent short circuits. Avoid common myths about rice or air drying for 24 to 48 hours, as these methods prove largely ineffective. Professional technicians recommend isopropyl alcohol exposure for water-damaged devices, as it evaporates completely without leaving residue. Persistent microphone issues following water exposure typically require hardware replacement by qualified technicians.
If your device has been submerged, internal microphone damage may not become apparent immediately. Corrosion develops gradually, often causing symptoms to worsen over days or weeks after the initial exposure.
Hardware vs Software: Is My Phone Mic Broken?
Distinguishing between hardware and software microphone failures saves time and money. Several diagnostic patterns help determine which category your problem falls into before seeking professional repair.
Software Problem Indicators
Microphone failures occurring immediately after software updates typically stem from bugs rather than physical damage. Issues affecting some applications while others work correctly suggest permission restrictions or app-level conflicts rather than hardware failure. Speakerphone functioning normally indicates the microphone hardware remains operational, pointing toward software or firmware issues instead.
Hardware Problem Indicators
Physical damage indicators include microphone complete silence across all applications, visible damage to port openings, or progressive worsening following drops or exposure to moisture. The bottom microphone failing while speakerphone continues working can indicate hardware damage requiring component replacement rather than software troubleshooting.
Testing Sequence for Diagnosis
Begin by testing your microphone in the device voice recorder app. Record a short message and playback immediately to confirm basic functionality. Test Siri or Google Assistant for voice recognition accuracy. Make a standard phone call while monitoring audio transmission. Attempt a FaceTime or video call to evaluate the secondary microphone. Document which functions fail and which succeed to narrow the diagnosis before contacting support.
Troubleshooting Sequence: A Step-by-Step Process
Working through microphone problems methodically prevents overlooking simple solutions. This sequence prioritizes quick fixes before advancing to more involved troubleshooting steps.
- Test in multiple applications to determine the scope of the problem and identify whether specific apps or all microphone functions are affected.
- Check microphone permissions for affected applications through device settings, ensuring access is granted where required.
- Restart your device using standard shutdown and power-on procedures to clear temporary software glitches.
- Update your operating system to the latest version, addressing known bugs and security improvements.
- Clean all microphone openings using appropriate tools, removing debris that may obstruct sound input.
- Reset all settings without losing personal data to restore default configurations that might resolve conflicts.
- Disable Bluetooth and connected accessories to rule out interference from external devices.
- Test in Safe Mode on Android devices to identify app conflicts as potential causes.
- Contact professional support if previous steps fail to resolve the microphone issue.
What We Know and What Remains Unclear
Understanding the certainty levels around microphone issues helps manage expectations during troubleshooting. Some causes have documented patterns while others remain less predictable.
| Symptom Category | Likely Cause | Certainty Level |
|---|---|---|
| Mic fails after iOS/Android update | Software bug or permission reset | High confidence |
| Muffled audio with visible debris | Physical obstruction | High confidence |
| Intermittent failure across apps | Software conflict or hardware degradation | Moderate confidence |
| Post-water-exposure silence | Hardware damage or corrosion | High confidence |
| Specific app only fails | App permission or compatibility issue | High confidence |
| Progressive worsening over weeks | Developing hardware fault | Moderate confidence |
| White noise in videos only | Update-related firmware bug | Moderate confidence |
The Role of Modern Phone Microphone Design
Smartphones rely on multiple microphone units positioned throughout the device to capture audio for various functions. The primary microphone handles voice calls and standard recording, while secondary units support noise cancellation, video recording, and voice assistant activation. This distributed design means that damage or obstruction affecting one microphone may not disable all recording functions.
Contemporary smartphone designs prioritize slim profiles and water resistance, often creating smaller microphone openings that accumulate debris more easily. Users who carry devices in pockets or bags expose microphone ports to fiber, dust, and particles that gradually restrict audio input. Regular maintenance becomes more important as manufacturers reduce opening sizes for aesthetic and durability purposes.
- Most modern phones include at least three microphone units serving different functions.
- Noise cancellation technology requires multiple mics to distinguish between user voice and background sound.
- Smaller microphone ports improve water resistance but increase clogging vulnerability.
- Voice assistant activation depends on dedicated microphone units with specific sensitivity requirements.
When to Seek Professional Repair
After exhausting software troubleshooting and cleaning steps, microphone problems may require hardware intervention. Recognizing when professional service becomes necessary prevents prolonged frustration and potential device damage from continued DIY attempts.
Apple recommends visiting an Apple Store or authorized service provider for microphone diagnostics. Attempting hardware repairs independently risks voiding warranties and causing additional damage to sealed components.
Apple Support Documentation
Professional technicians have access to specialized tools and replacement parts unavailable to general consumers. They can evaluate whether microphone failure stems from a single failed component, connected circuitry issues, or broader system problems affecting audio processing. Device-specific diagnostic software helps pinpoint exact failure locations for targeted repair.
Unauthorized repairs may void manufacturer warranties. Visiting Apple Stores, Samsung service centers, or manufacturer-authorized repair shops ensures that warranty coverage remains intact while receiving qualified technical support.
Summary and Next Steps
Phone microphone problems rarely require professional repair. Software issues, permission restrictions, and debris accumulation account for the vast majority of reported failures. Working through the diagnostic and troubleshooting sequence methodically typically identifies the cause and guides users toward appropriate solutions.
Start with basic testing and permission verification before advancing to device restarts and cleaning procedures. Update your operating system to address known bugs. Clean all microphone openings thoroughly using appropriate tools. Seek professional service only when software solutions and careful cleaning fail to restore normal microphone function.
Why is my phone microphone not detected in apps?
App-level microphone detection failures typically stem from permission restrictions. Navigate to your device settings, locate the affected app, and verify that microphone access is enabled in the permissions section. Some apps require you to grant permission specifically within the app interface before accessing audio features.
How do I fix my phone microphone after water damage?
Power off the device immediately following water exposure. Avoid rice or air drying methods that prove largely ineffective. Professional technicians recommend isopropyl alcohol exposure to displace moisture without residue. Complete microphone failure following water exposure often requires hardware replacement rather than software troubleshooting.
Why is my phone microphone quiet during calls?
Quiet microphone output during calls usually indicates debris accumulation in the primary microphone opening or permission restrictions specific to calling applications. Test your microphone in voice recording apps to determine whether the issue affects all functions or calling specifically. Clean microphone openings thoroughly and verify calling app permissions.
Can a software update fix microphone issues?
Software updates frequently address microphone bugs introduced by previous versions. iOS and Android updates sometimes include specific fixes for audio-related issues reported by users. Checking for available updates through your device settings and installing the latest version may resolve microphone problems without additional troubleshooting.
How do I know if my phone microphone is hardware damaged?
Hardware microphone damage typically produces consistent failure across all applications rather than specific app issues. If your microphone fails completely in voice recorder apps, during calls, and for voice assistants, physical damage becomes more likely. Visible damage to port openings or history of drops or water exposure also suggests hardware involvement.
More related posts
 Dyson WashG1 Review: Real Tests, Pros, Cons & Alternatives
 North Face Jacket NZ: Prices, Retailers & Models Compared
 Chanel Harris-Tavita: Age, Family, Contract & Career
 How to Get Oil Stains Off Clothes: 5 Proven Methods
 NZ Drivers Licence Changes 2027: Learner Period Extended
 Main Street Cafe Invercargill: Menu, Hours, Reviews Guide
 Most Capped All Blacks Players: Whitelock Leads with 153
 Live Wire Super Park Guide: Activities, Prices & Locations